Hosting a static website on Azure
- October 23, 2018
- Azure Azure storage Static website
-


It has been possible to host static files in Azure Storage for a long time, but there were some limitations. Probably the most important one - you weren't able to specify the default document for a directory. You could display a page with the URL https://blog.kabrt.cz/index.html, but URL https://blog.kabrt.cz would return the 404 page. There were ways around it (e.g. Azure Functions proxy), but it felt too cumbersome. With the introduction of Static Website in Azure Storage, this limitation is gone and I'd like to explore this feature and move my blog to Azure.
Static website hosting
When you enable this feature on your storage account a new container named $web is created and you can specify the default document and custom 404 page. Files from this container are served from the special public endpoint. It is acting as a proxy between visitors of your web page and your storage account that handles default documents and other settings. Access to the public endpoint is read-only and anonymous. To modify your files, you can use your blob storage endpoint.
For instance, file uploaded to:
https://blogkabrtcz.blob.core.windows.net/$web/assets/icons/not-found.svg
is available at the URL:
https://blogkabrtcz.z6.web.core.windows.net/assets/icons/not-found.svg
If you set the default document to index.html the file uploaded to
https://blogkabrtcz.blob.core.windows.net/$web/about/index.html
is available at the URL:
https://blogkabrtcz.z6.web.core.windows.net/about
Creating Static Website in Azure Blob Storage
I am going to show, how to setup Static Website hosting in Azure Blob Storage on the example of this blog.
Create a new storage account
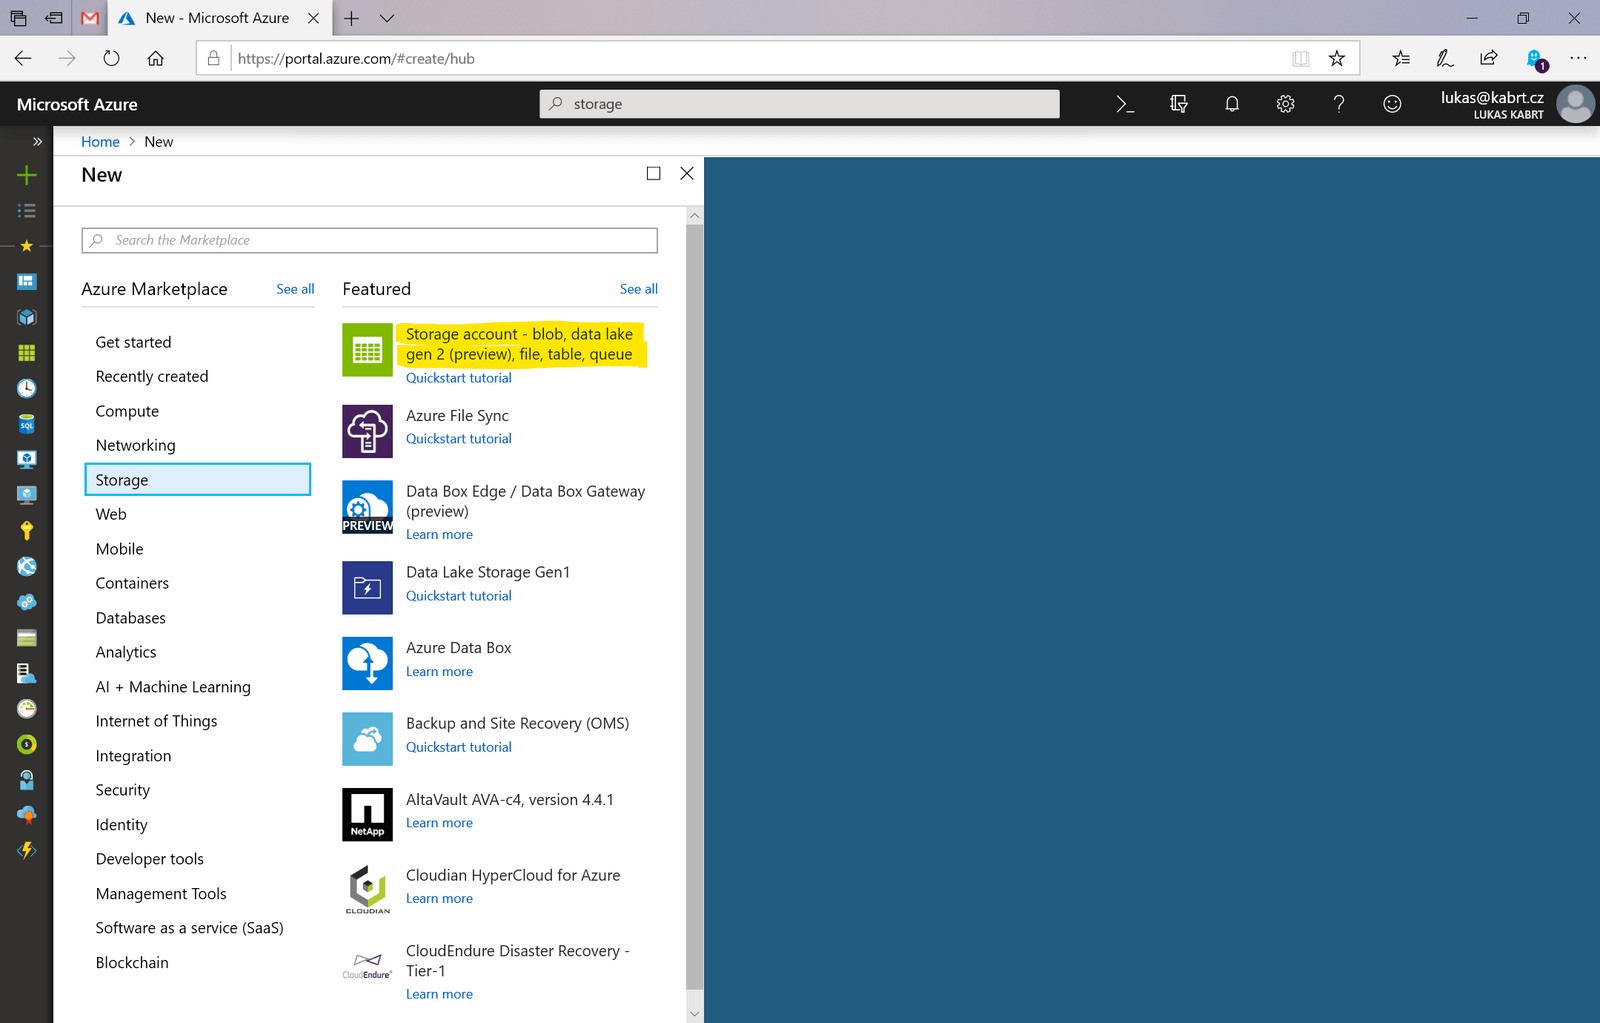
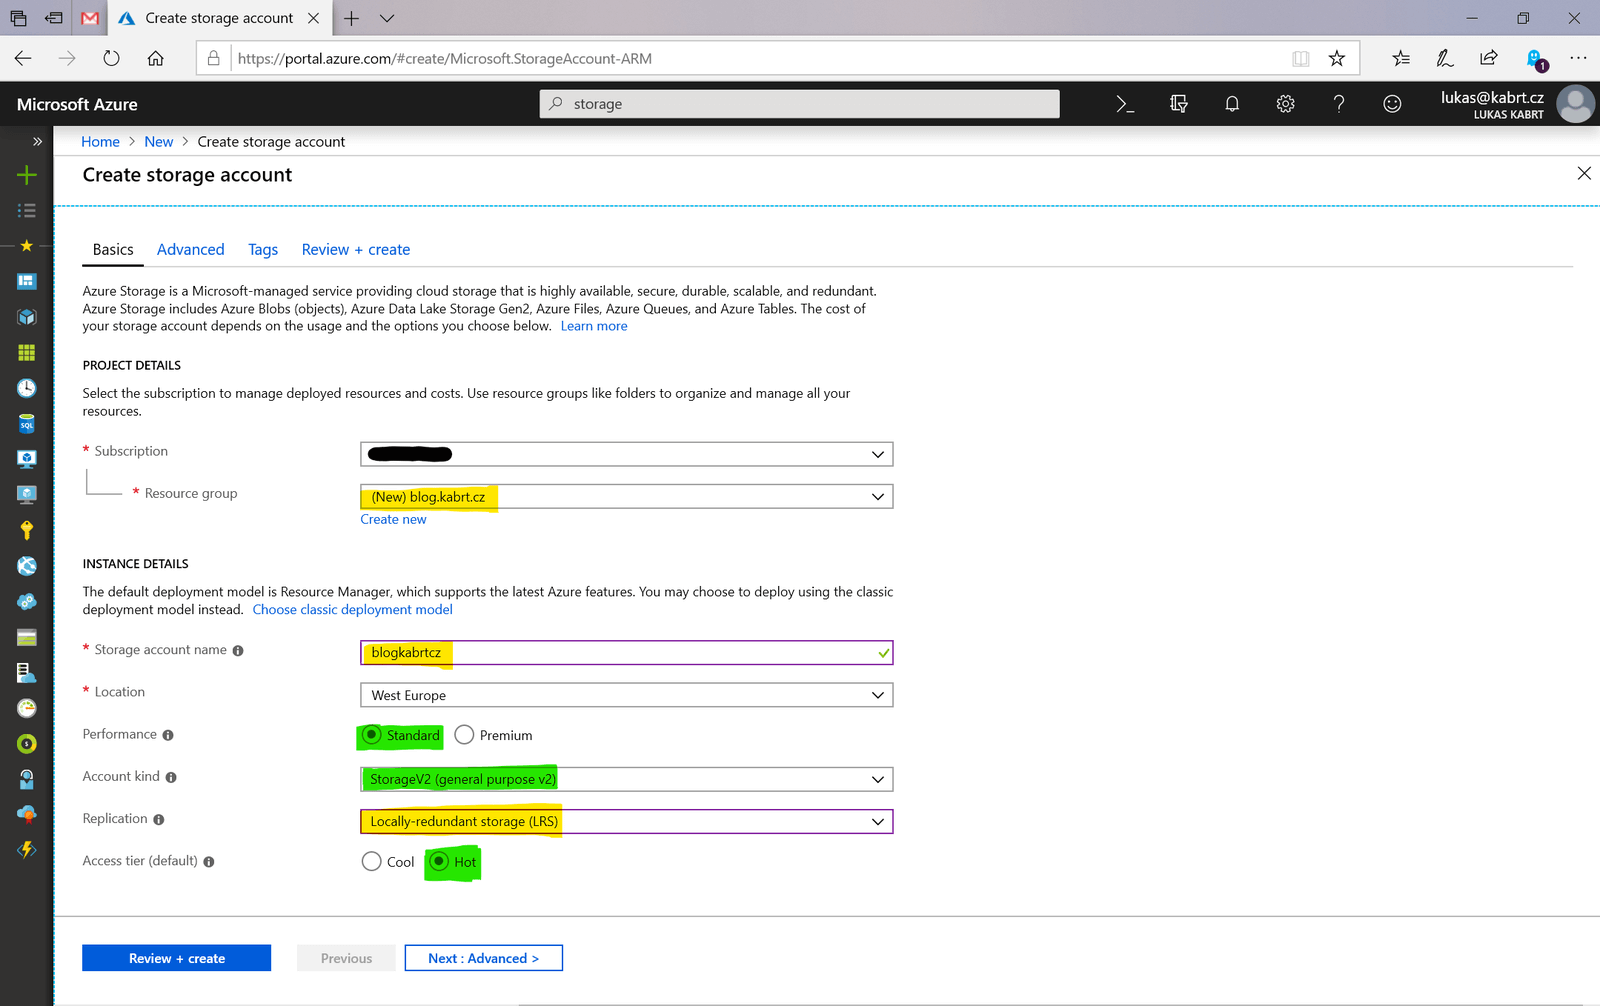
Choose an appropriate resource group, storage account name (remember the account name is part of the URL and it can't be changed later) and replication mode. I have all source files for my website in the repository, so I have chosen Locally redundant storage. Make sure to select Standart performance tier and General purpose v2 account as Static Website hosting is only available on this account type. It also doesn't make a lot of sense to choose Cold Access tier, because the majority of files will be read very often and you pay more for data retrieval form Cold Access tier storage.
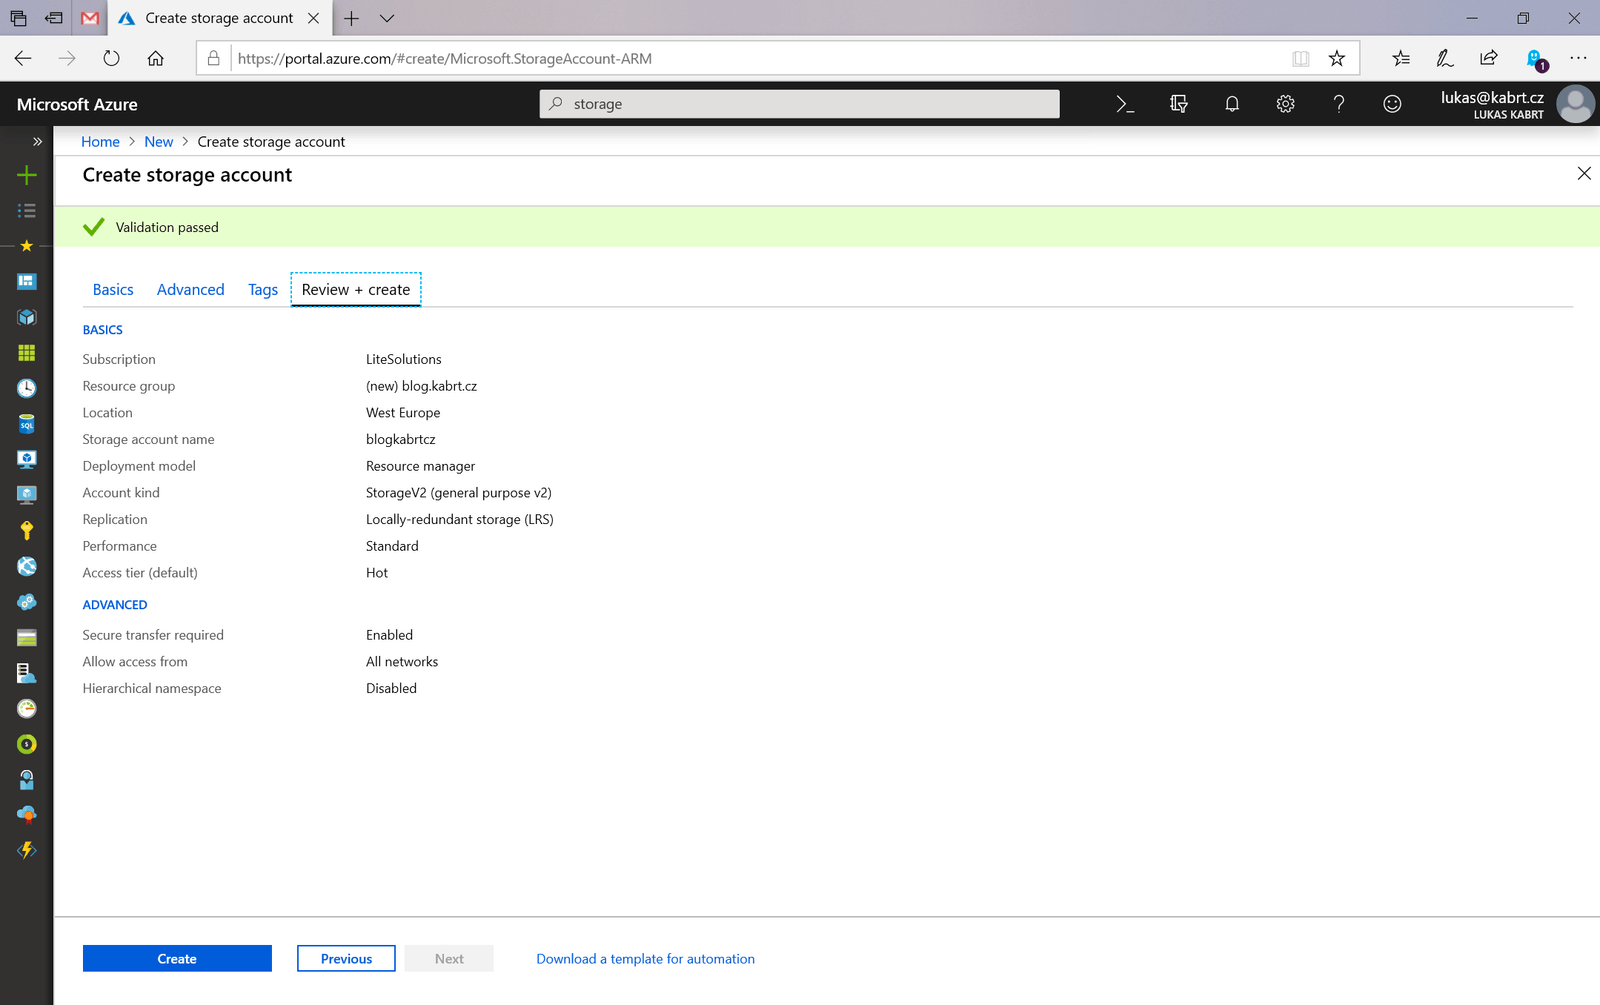
Review the settings and click create.
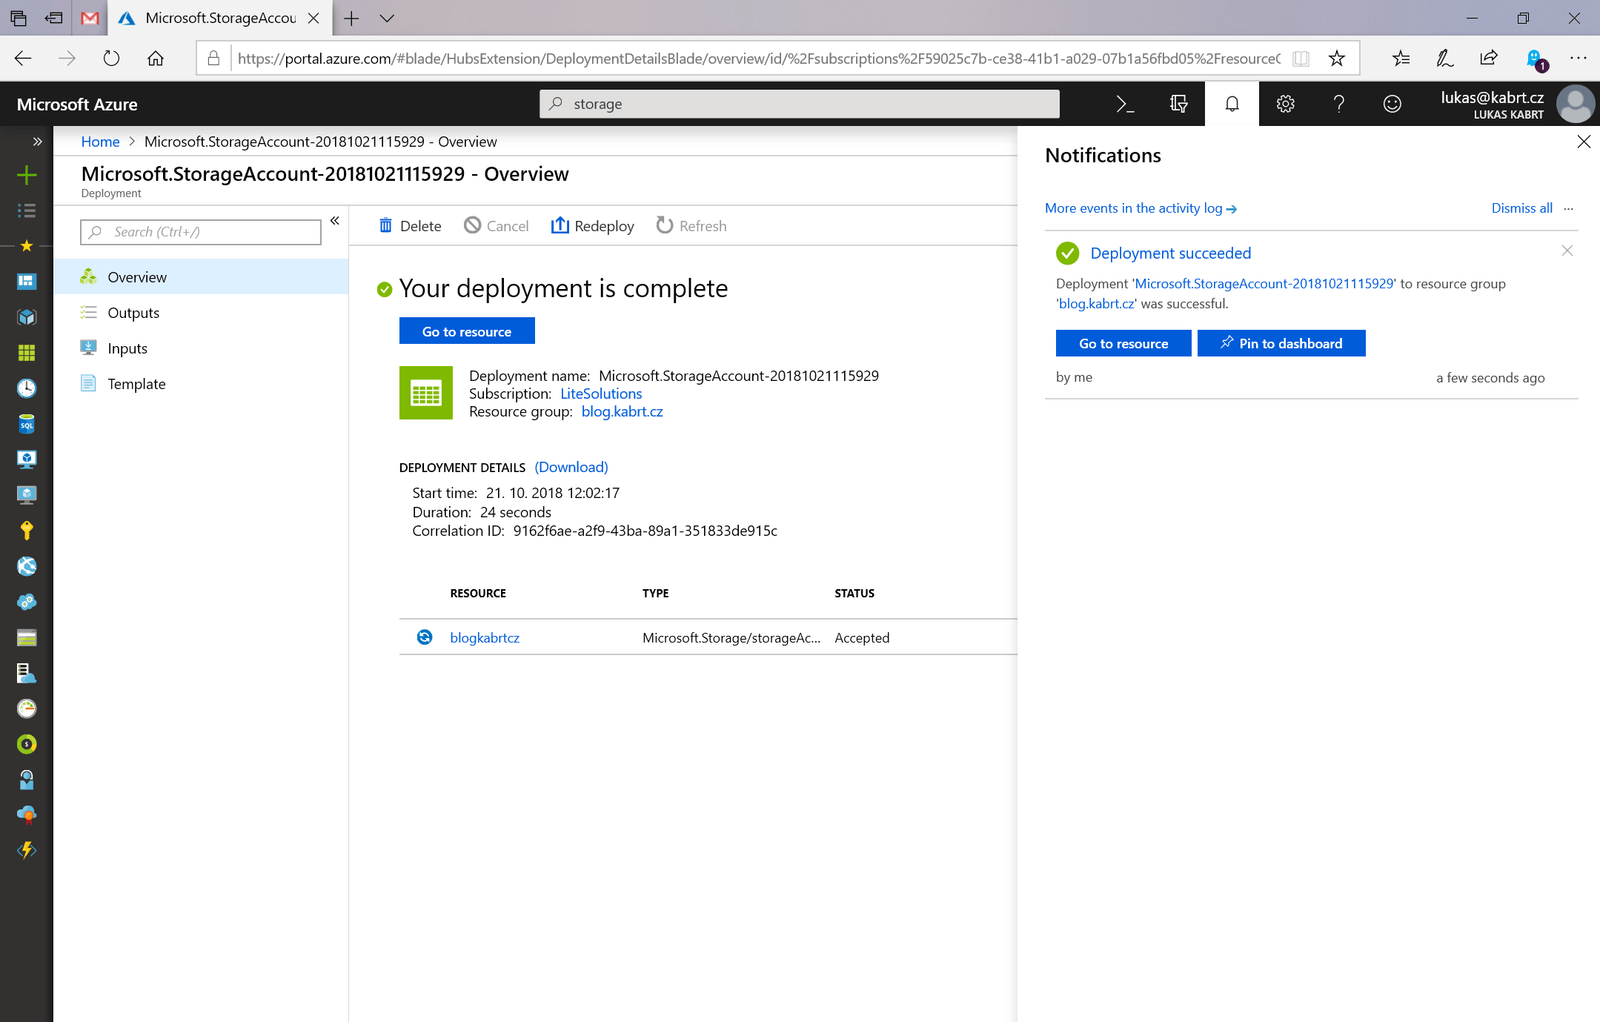
After several seconds the storage account is created and you can open Storage Account details.
Setup Static Website hosting
The Website hosting feature can be enabled in the Settings section.
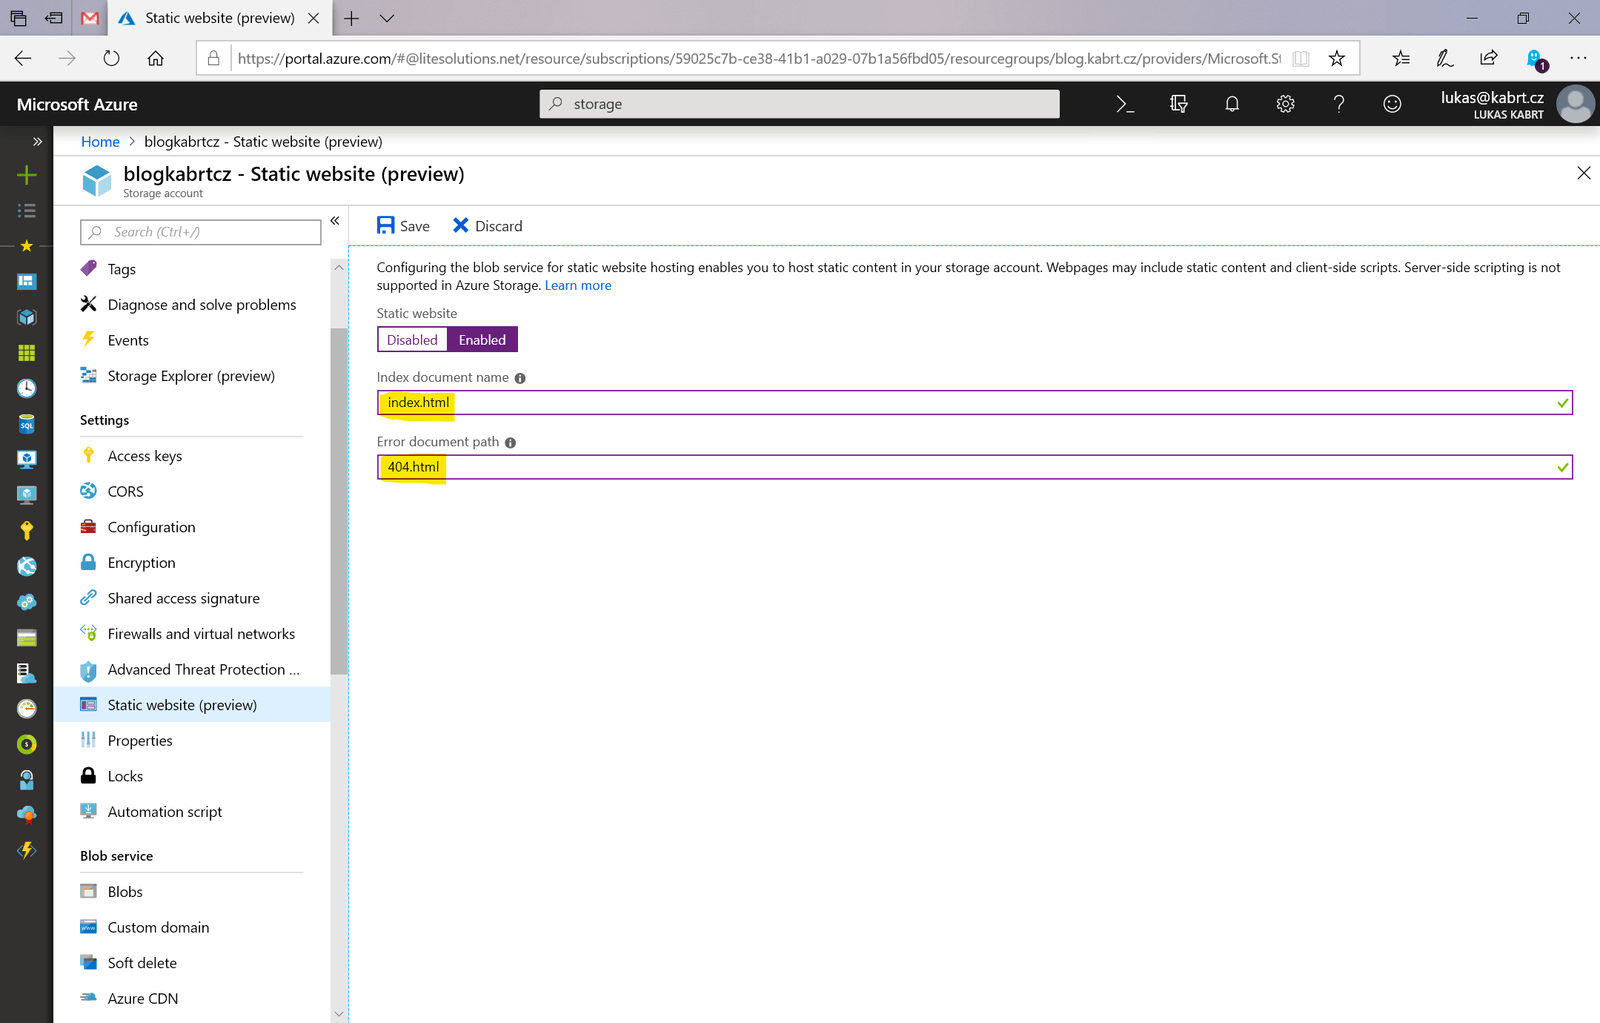
Click Enabled and select the index document name and the error document path.
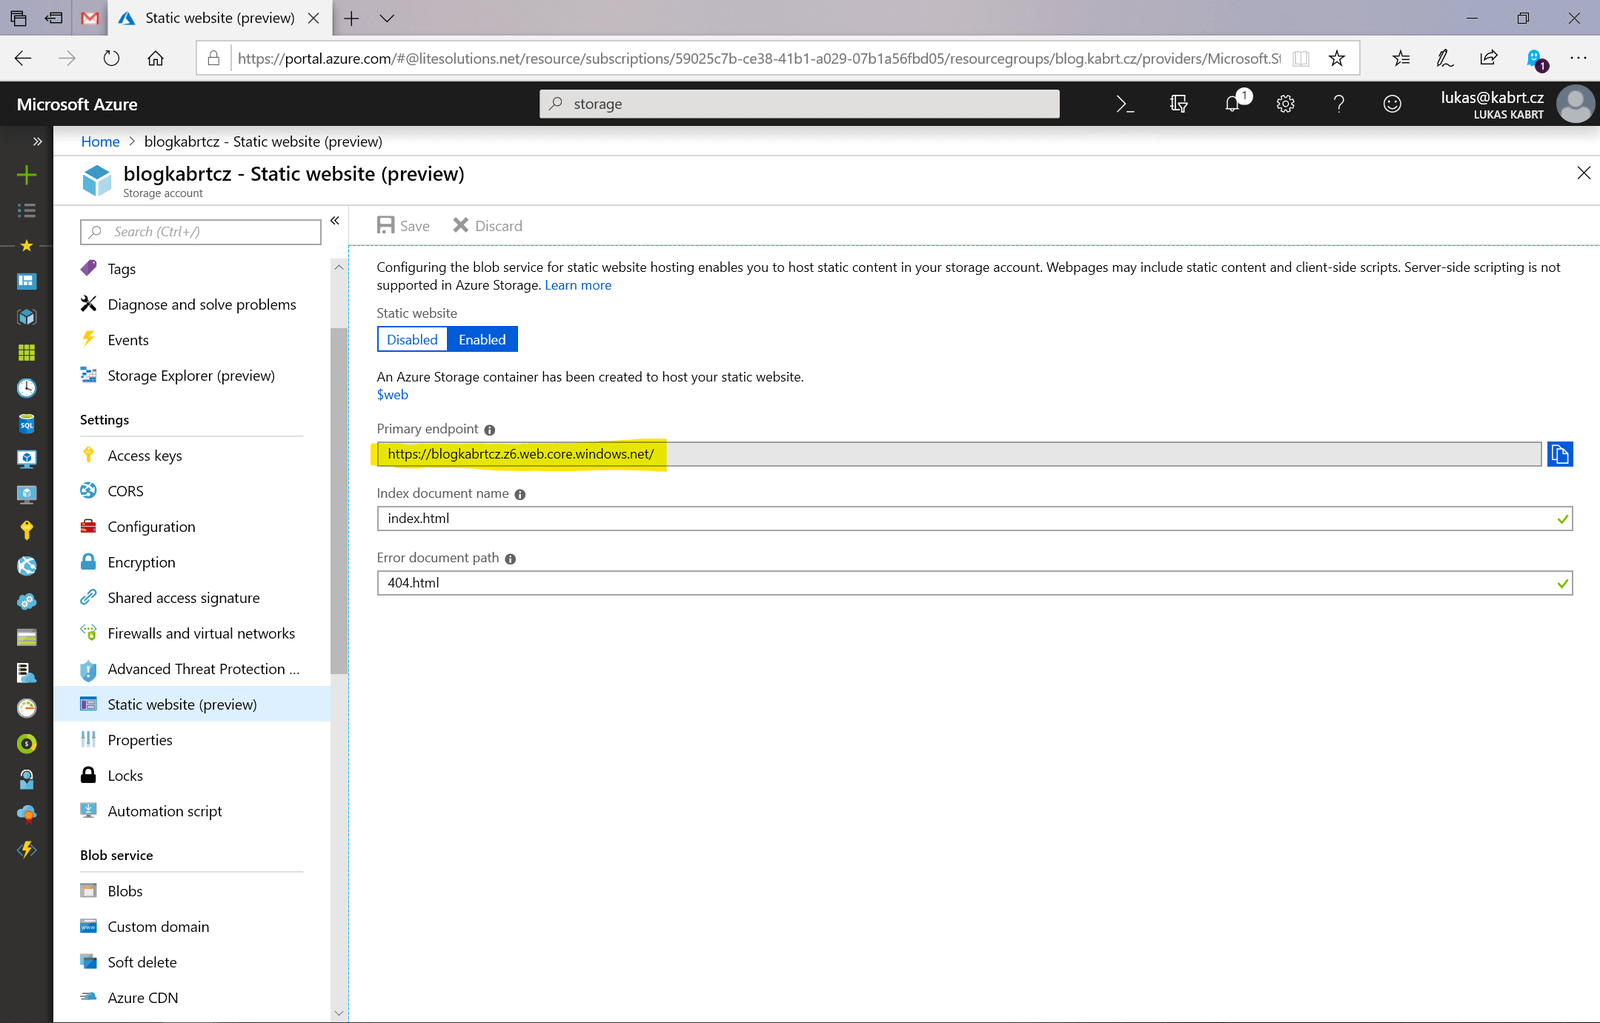
When you save the settings, the public endpoint for your static website is generated. Now you can upload content of the website to the $web container.
Upload website content
There are many ways to upload files to a blob container - you can use Storage explorer build into the Azure Portal, Microsoft Azure Storage Explorer, Azure Storage API and number of client libraries or use AzCopy utility. Because I would like to automate deployments of the website in the future I'm going to use AzCopy.
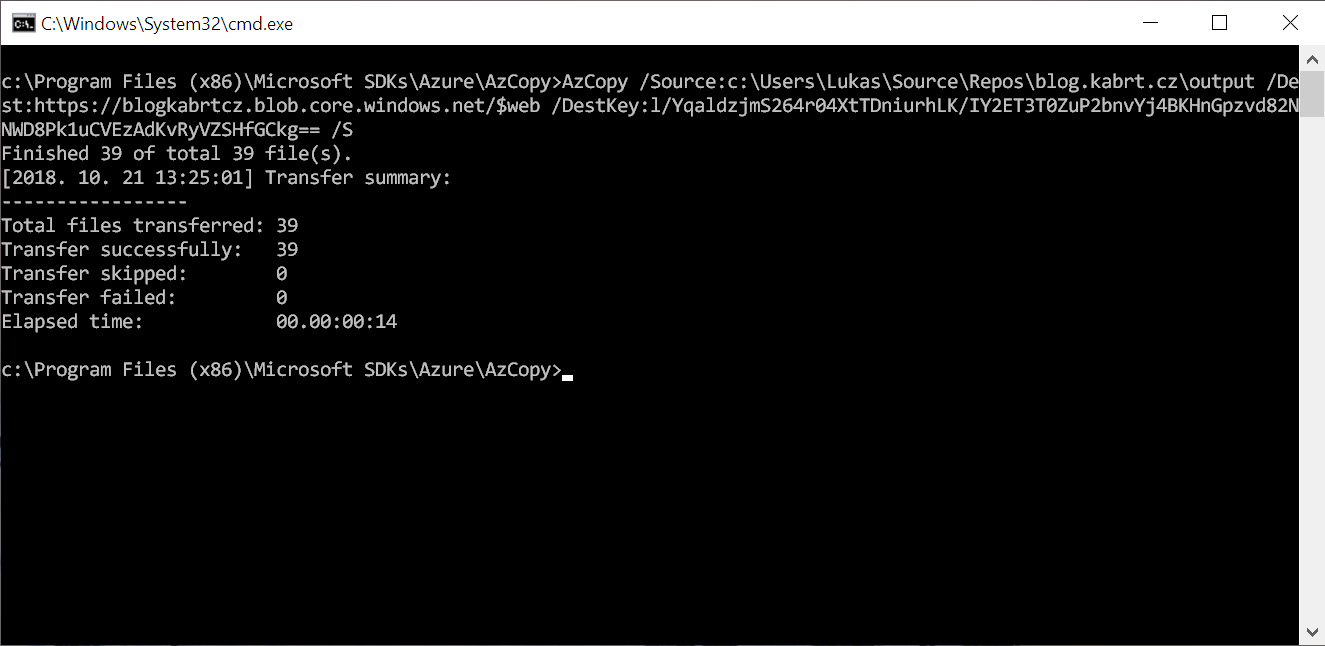
By default AzCopy is installed to the c:\Program Files (x86)\Microsoft SDKs\Azure\AzCopy directory so open the Command prompt and navigate to the installation directory
cd "c:\Program Files (x86)\Microsoft SDKs\Azure\AzCopy"
Files from the local drive can be uploaded to the storage with the following command:
AzCopy
    /Source:c:\Users\Lukas\Source\Repos\blog.kabrt.cz\output
    /Dest:https://blogkabrtcz.blob.core.windows.net/$web
    /DestKey:l/YqaldzjmS264r04XtTDniurhLK/IY2ET3T0ZuP2bnvYj4BKHnGpzvd82NNWD8Pk1uCVEzAdKvRyVZSHfGCkg==
    /S
    /SetContentType
/Sourcespecifies local folder with content of your website/Destspecifies the storage account and container, where the files will be uploaded (use Blob storage endpoint not public Website endpoint)/DestKeyis Access key to your Azure Storage account/Sswitch instructs AzCopy to copy recursively all files and directories/SetContentTypeswitch sets correct MIME types for individual files, otherwise all file are uploaded with theapplication/octet-streamMIME type. Such files might not be interpreted correclty by browsers.
When the upload finishes, you should see a summary of the operation
and finally, you could test the website in the browser

Pricing
Hosting a static website in the Azure Blob storage is very affordable. Depending on the replication settings, you pay from $0.0196 per GB for storage and $0.087 per GB transferred out of the datacenter.
Limitations
There is one major limitation - you can bind a custom domain to your website, but you can't use SSL certificate for the custom domain. In the next post, I am going to show, how to setup CDN, to overcome this limitation.